
Symmetra is still an absolute beast in the current meta due to her overpowered left-click’s Photon Projector. She has been so OP that Blizzard decided to nerf her Projector’s damage and width back in Sept 2019, but that doesn’t stop her from continuing dominating the game. She is still very much viable as a DPS even after the nerf. She is definitely still the best pick in maps such as Hanamura.
In this guide, we will show you some of the best spots for placing Sym’s sentry turret and teleporter both as a defender or an attacker.
Defend: Symmetra in Hanamura
Teleporter
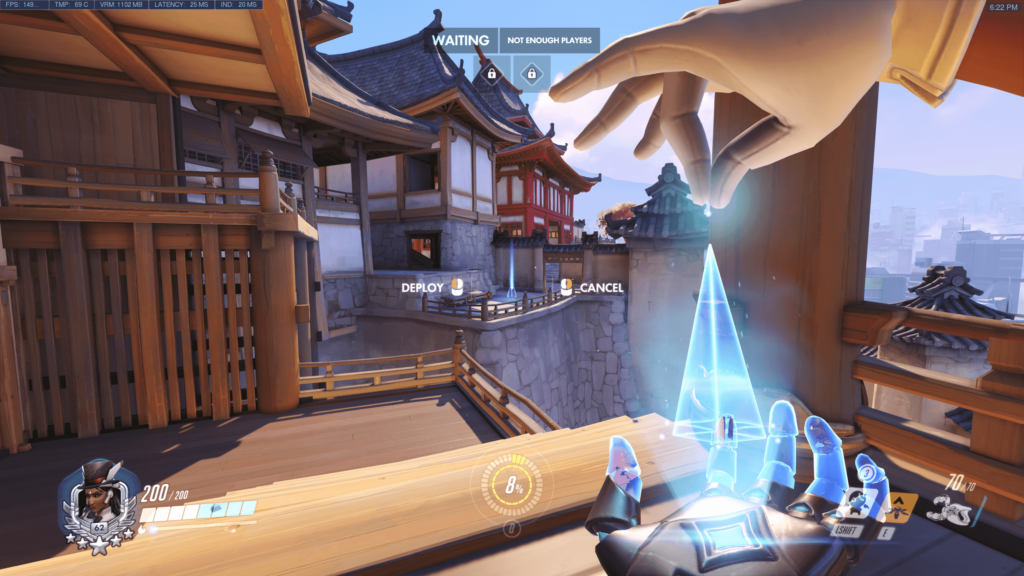
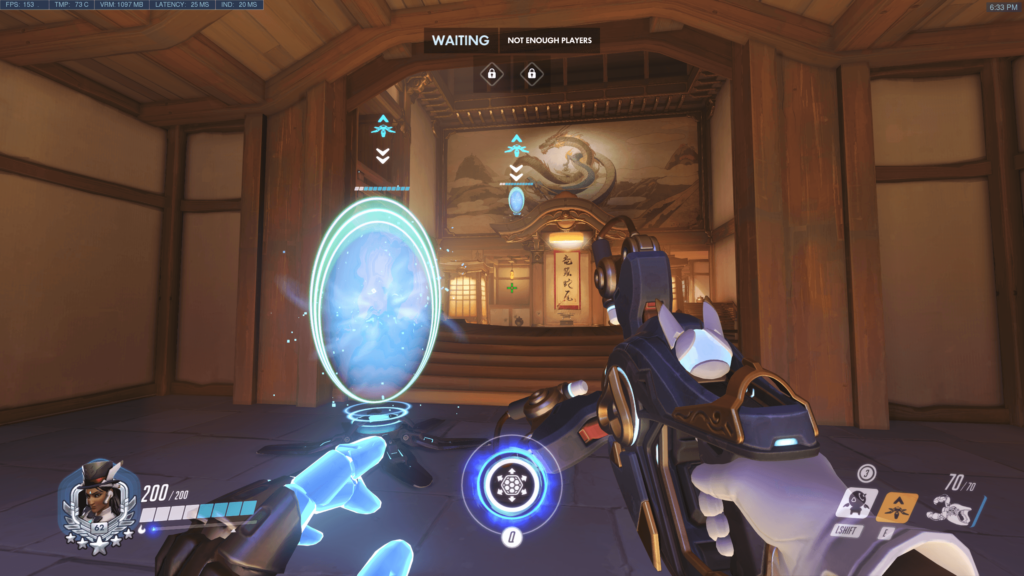
Point B to A teleporter: This teleporter setup provides the shortest route from point B spawn to point A. By using this teleporter, your dead teammates can quickly rejoin your team in the shortest time possible. Even after a wipe, with a good hold from Hammond or other heroes, your team can quickly rejoin the fight and retake the point.
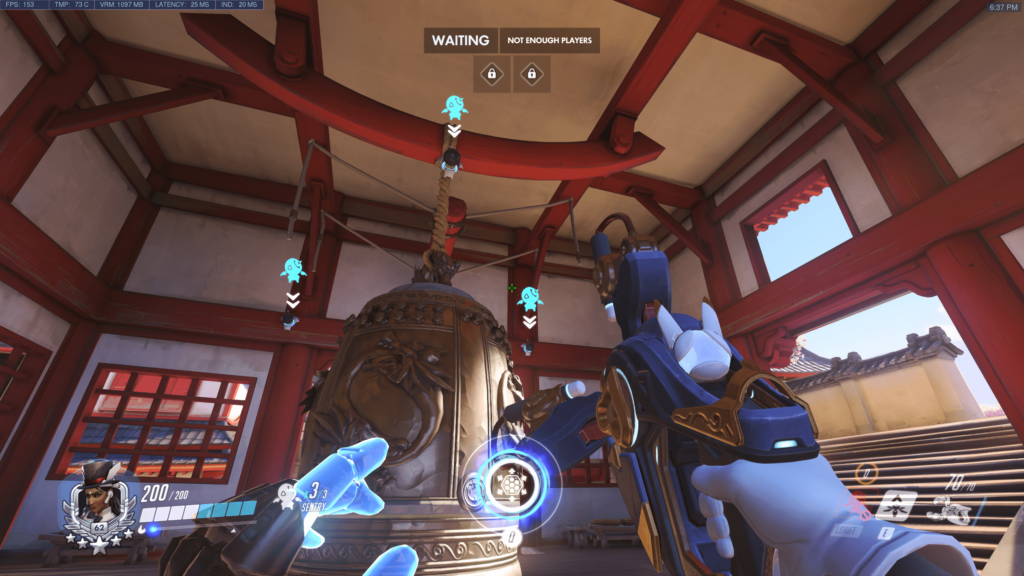
Alternatively, if you don’t want a quicker rejoin route, you can use your teleporter to create a bunker setup with Bation up on top of the point A temple where most heroes couldn’t get there as easily without the help of these abilities.

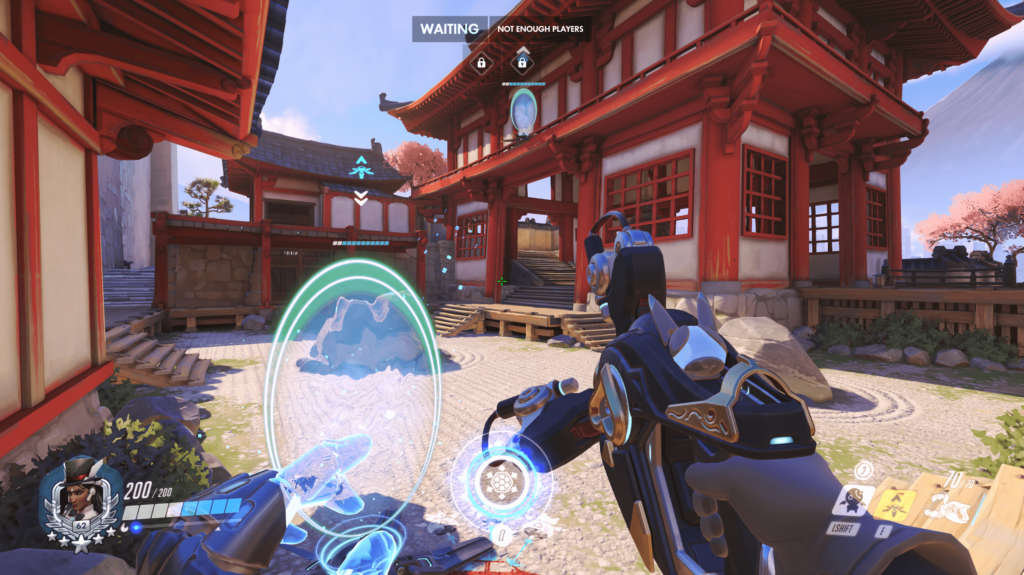
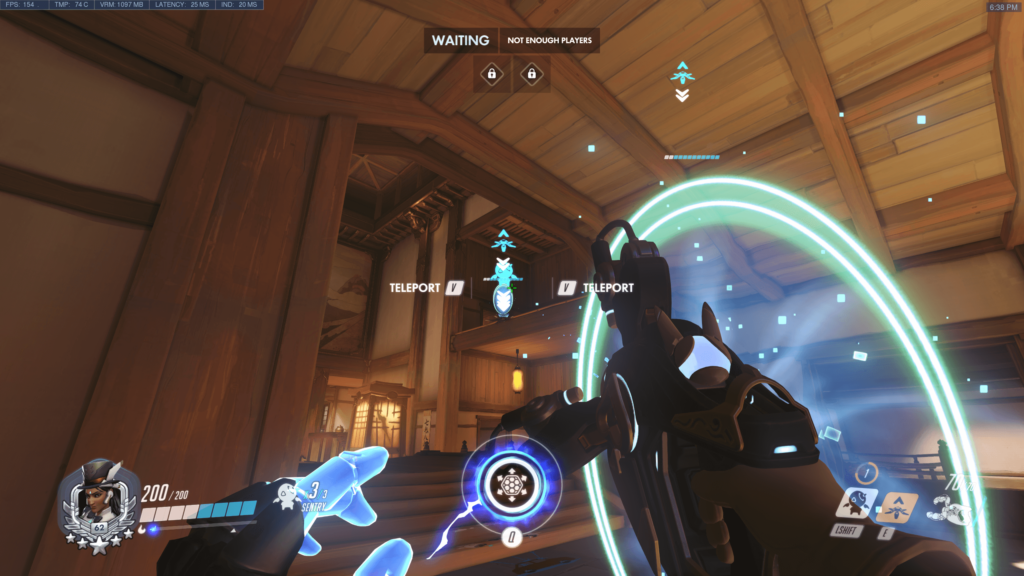
As for defending point B, you can setup a bunker with your team up on the high ground as shown in the screenshot above. This high ground gives you and your team massive advantage as you will have full view of the entire point B and it is extremely difficult for attackers to get up there while taking heavy fire from your team.
Note: Be aware of enemy team’s Mccree when he has his ult. His high noon can easily pick a few kills as there is no where to hide from there.
Sentry Turret
Sentry turret placements are very situational depending on what heroes the enemy team has. The tips below are some of the most common and effective spots for placing sentry turret for highest possible damage output and least possible exposure to the enemy.
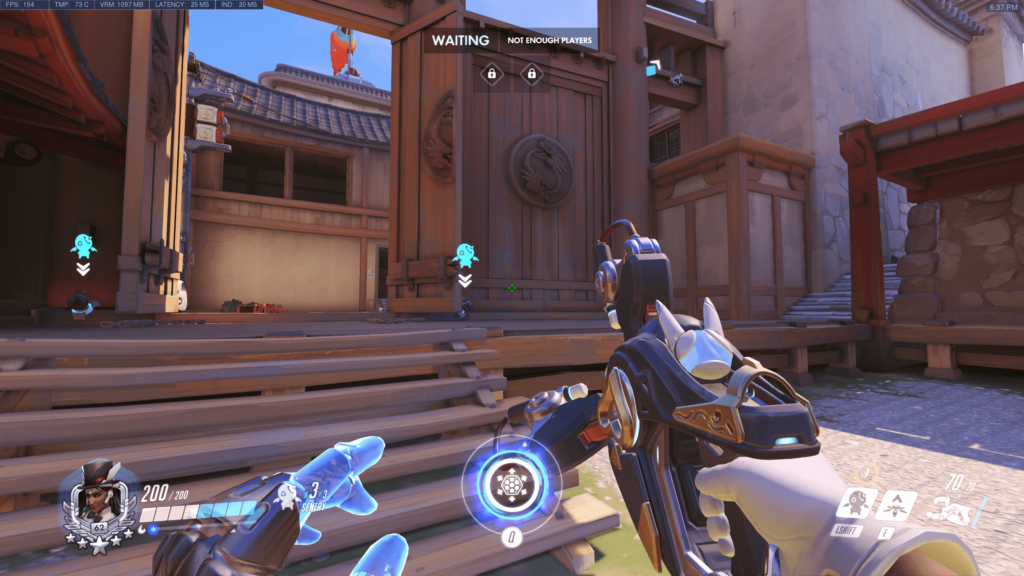
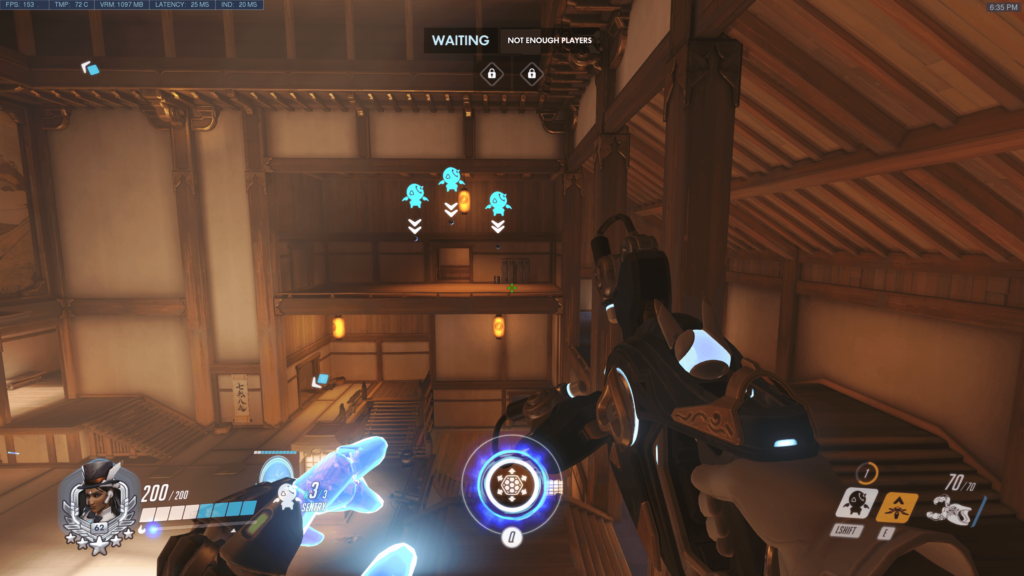
I recommend placing a sentry turret deep inside and behind the left door. Placing it that way can make sure your enemy couldn’t see it without turning their back to your team. Similar to the left placement, you can place another behind the right door. I also recommend to place one near the window to help disrupting and slowing enemy flankers such as Genji and Doomfist.
When you are pushed back to the point, just place your turrets anywhere inside the temple as long as they are high enough on top and preferably backward-facing your enemy team.
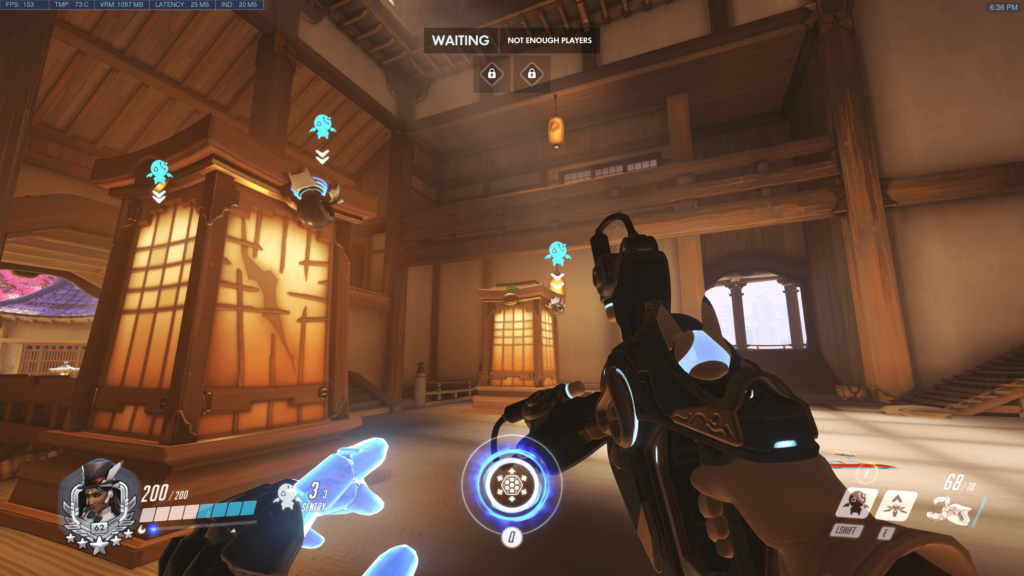
As for point B, you can try placing them as shown in the two screenshots above where most attacker team would go. The key is to place them in such a way that the enemy has hard time finding them or even noticing them. The tips are to place them high enough and backward-facing where they will have to look backward and look up high before they can clear your turrets.
Attack: Rushing with Symmetra
Teleporter
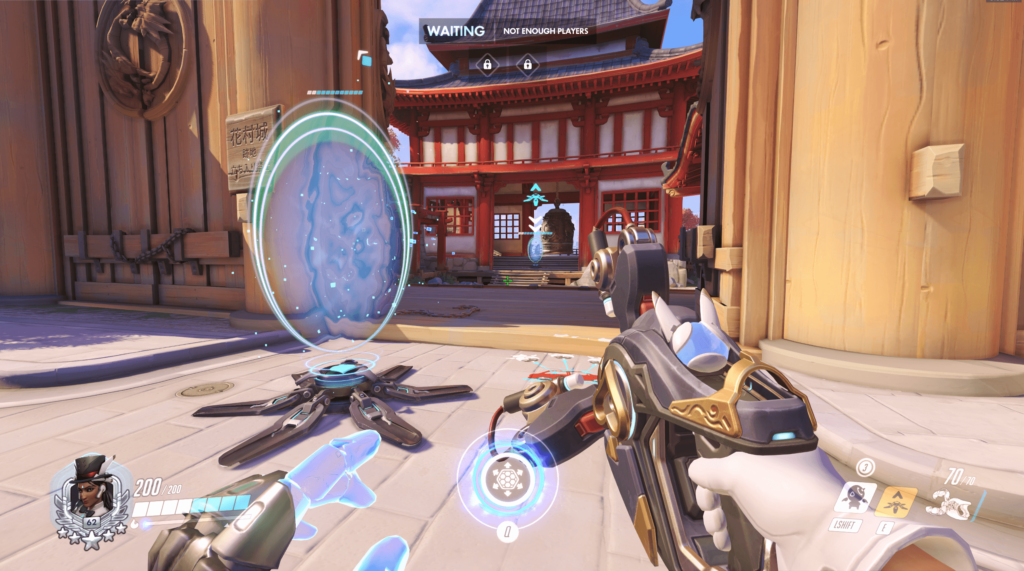
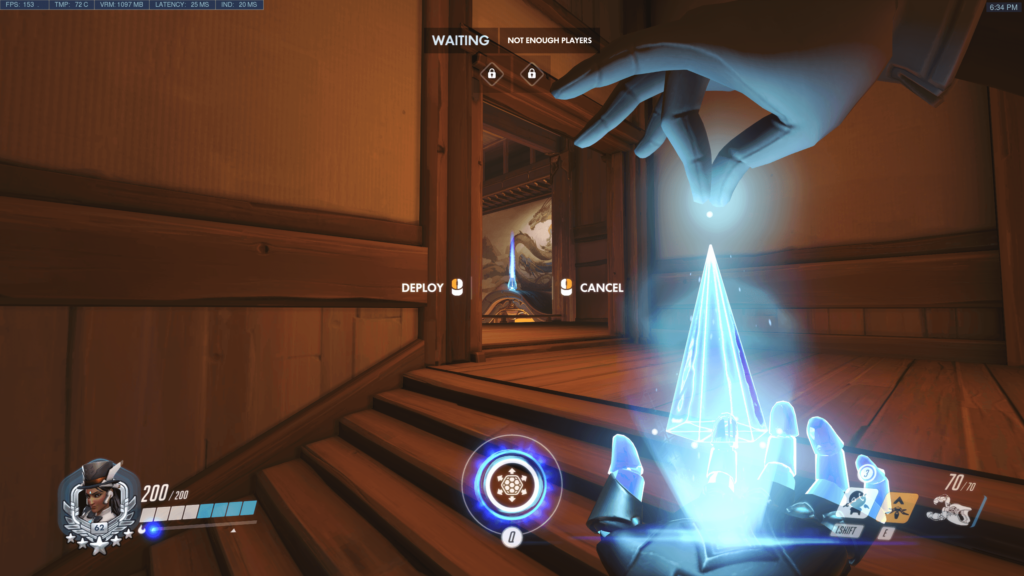
This teleporter’s placement is the most common yet also the most effective and deadly strategy for rushing point A in Hanamura with a Symmetra in the team. This strategy works only if your team has a Reinhardt or double shields and have them shield you while you place your teleporter. This is a choke point where you will most likely die before even placing the teleporter if you don’t have a shield.
Once the teleporter is placed, your teammates have to quickly interact with it and teleport to the point. You should be the first to reach the point and quickly place your sentry turrets in the point before the defenders rush back into the point.
For point B, if your team decides to go to the choke on the right, you can place your turret from the stairs to the top of the roof on the point with the help of a shield and send your teammates there.
If your team decides to go from the middle way, you can setup your teleporter as shown above to take the high ground advantage.
Sentry Turrets
As for turrets, since you are an attacker, in most cases you will be placing your turrets only after you get to the point. Teleport to the point or places in your favor, then quickly place your turrets to disrupt your enemy team.
Alternatively, you can send your turrets to the back line of the enemy team by first putting 3 turrets on the floor then place your teleporter right on top of them and to wherever you want them to be. This strategy could sometimes pick 1-2 enemy supports or DPS.
Summary
The Symmetra’s teleporter and sentry turrets placement guide above are just what I think the most effective ways of using them. It’s entirely up to you if want to follow it or if you have even better ideas on placing them effectively in competitive plays. Feel free to share your ideas with us in the comment section below!
Simple Tips to Be a Better Soldier 76 in Competitive Plays
Soldier 76 is probably the most common and easiest to use hero for every beginner in Overwatch due to his similarity as a first person shooter character in other FPS games. Soldier 76 is also the starting hero everyone uses in the training mode in Overwatch. He is easy to use but not as easy […]
How to Play Ashe Effectively in Competitive Games
Ashe is a long range (with scope) hitscan DPS hero in Overwatch. She is also one of the highest damage dealers in the entire game due to her powerful dynamite that deals AOE explosive and burning damage to surrounding enemies. She may not be the perfect choice in current meta, but still very much viable […]
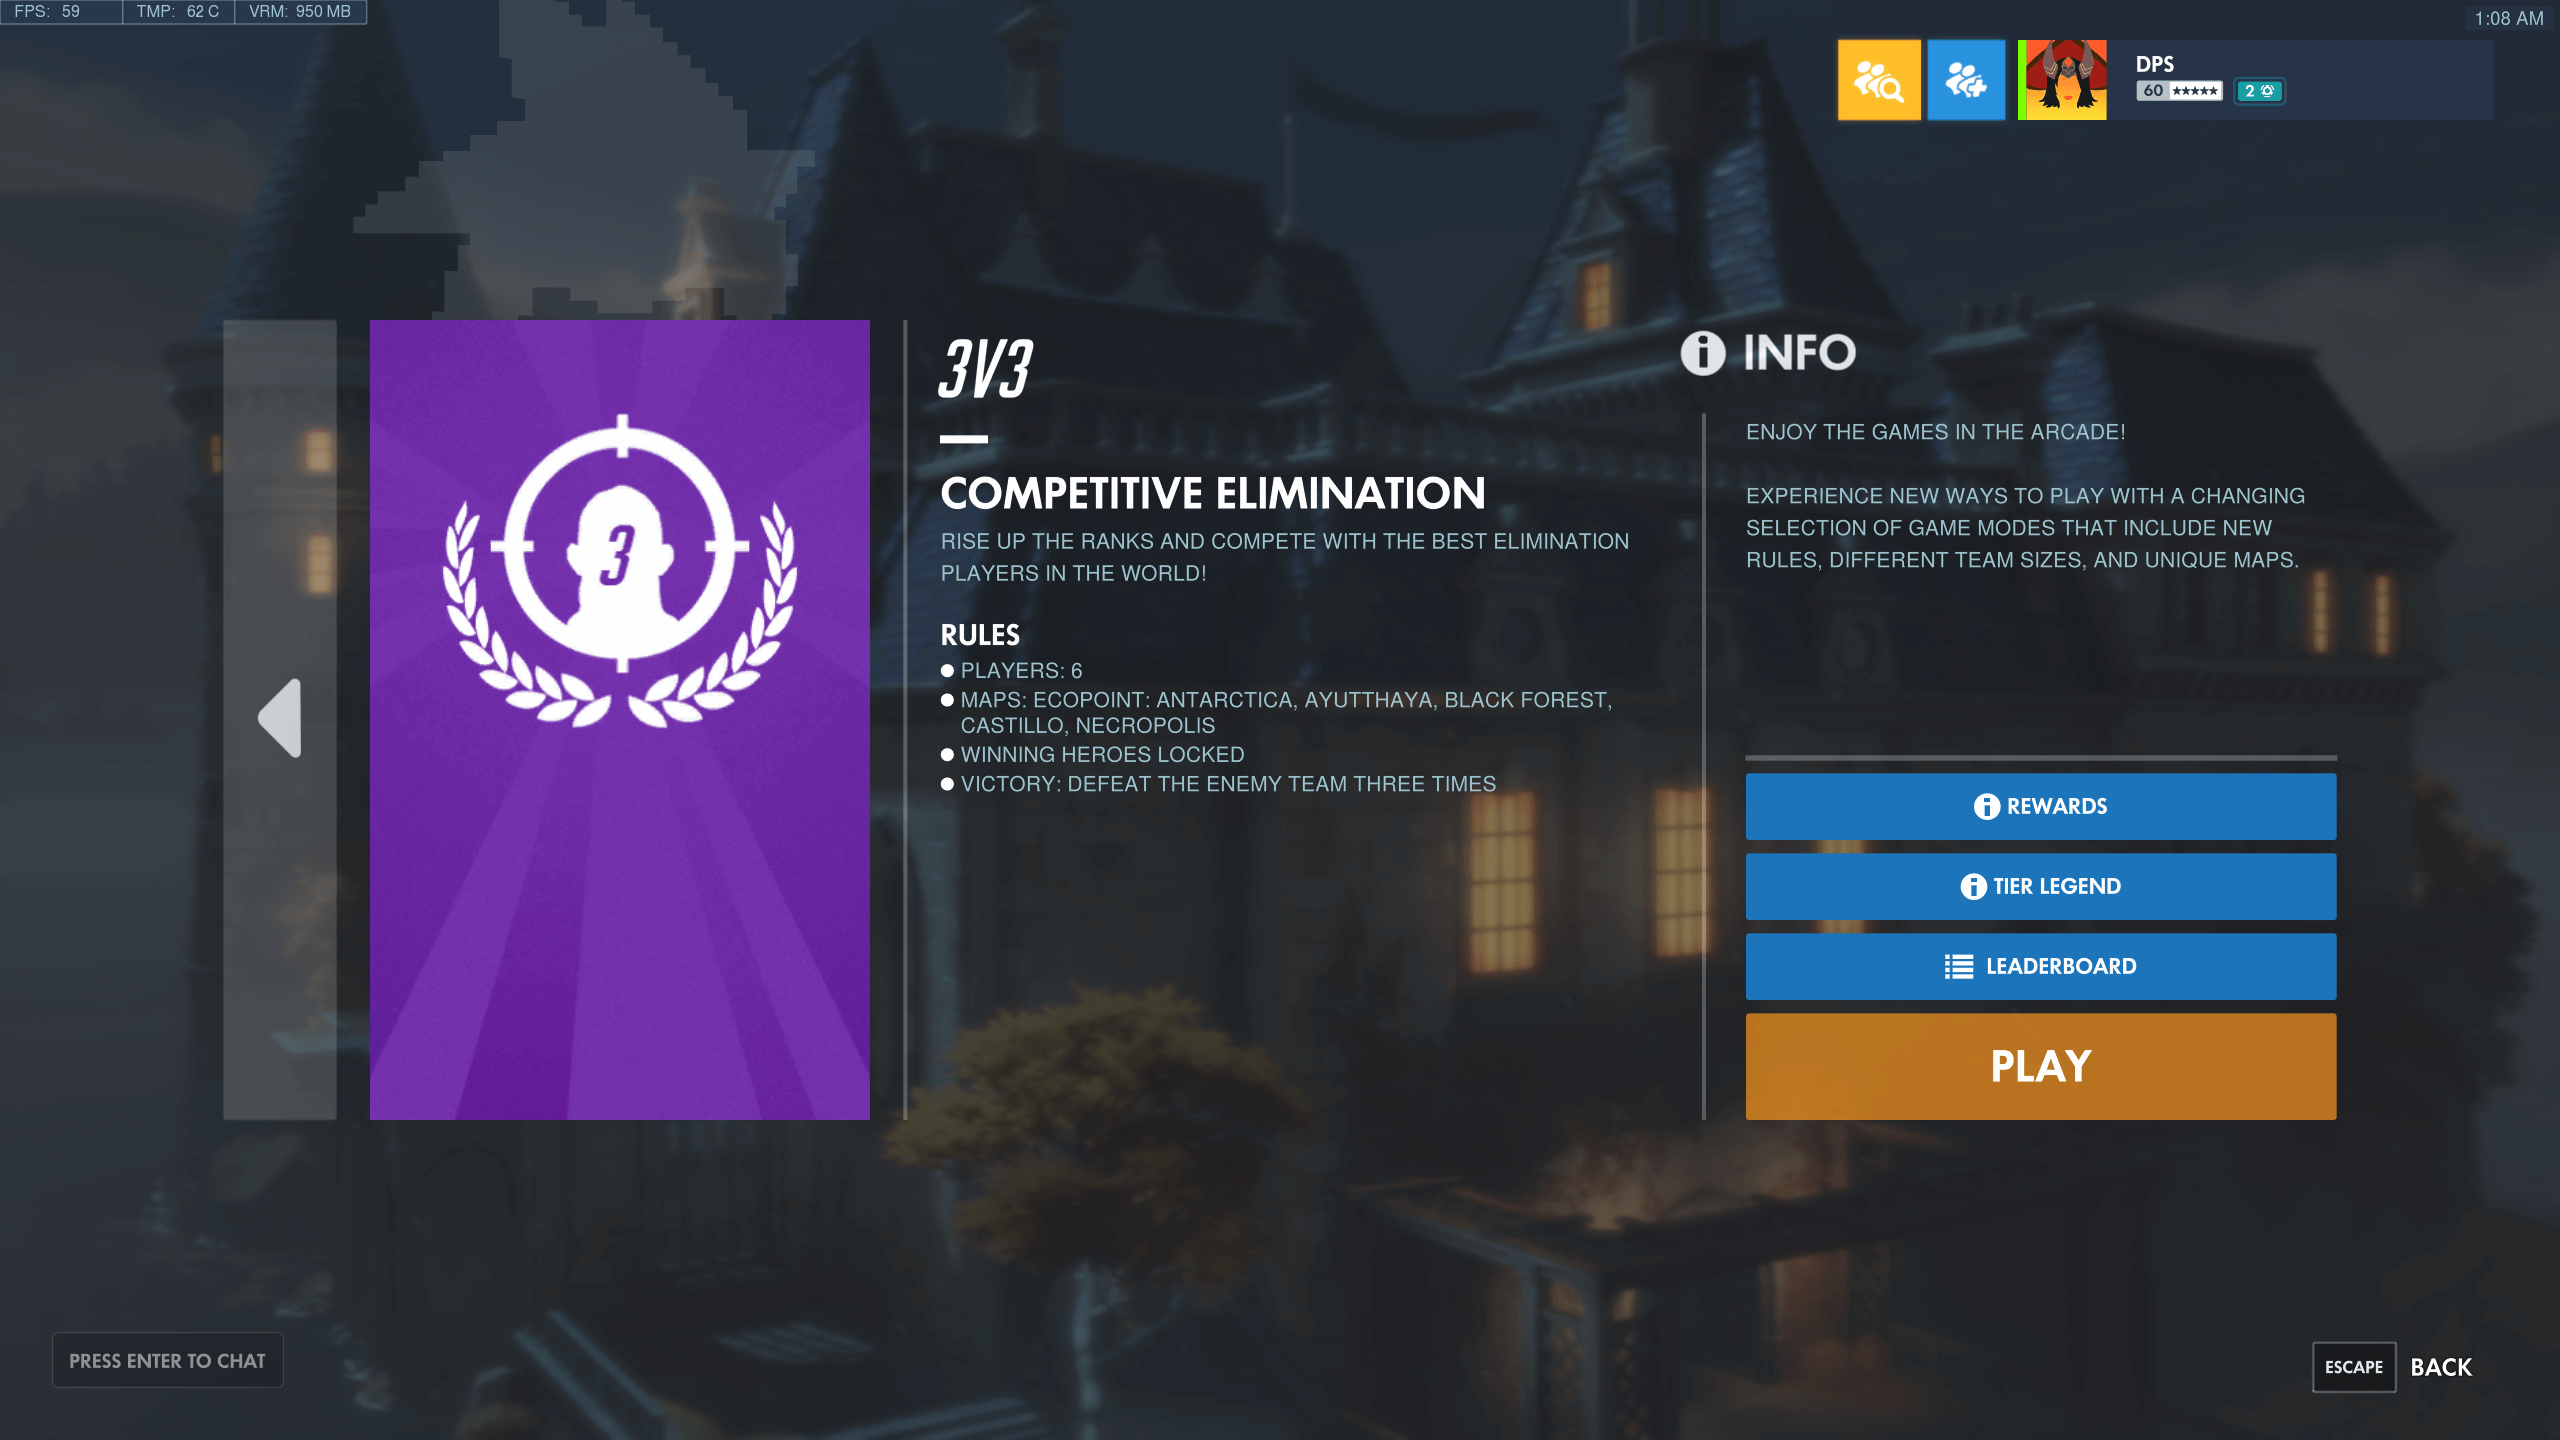
Best Heroes for 3v3 Competitive Elimination in Overwatch Arcade
The 3v3 Competitive Elimination is a seasonal Arcade Mode in Overwatch. It is similar to that of the casual 3v3 Elimination. The competitive mode gives players a rank (SR) and reward players with competitive point in the end of the season. This guide shows a list of the top picks and probably the best performed […]
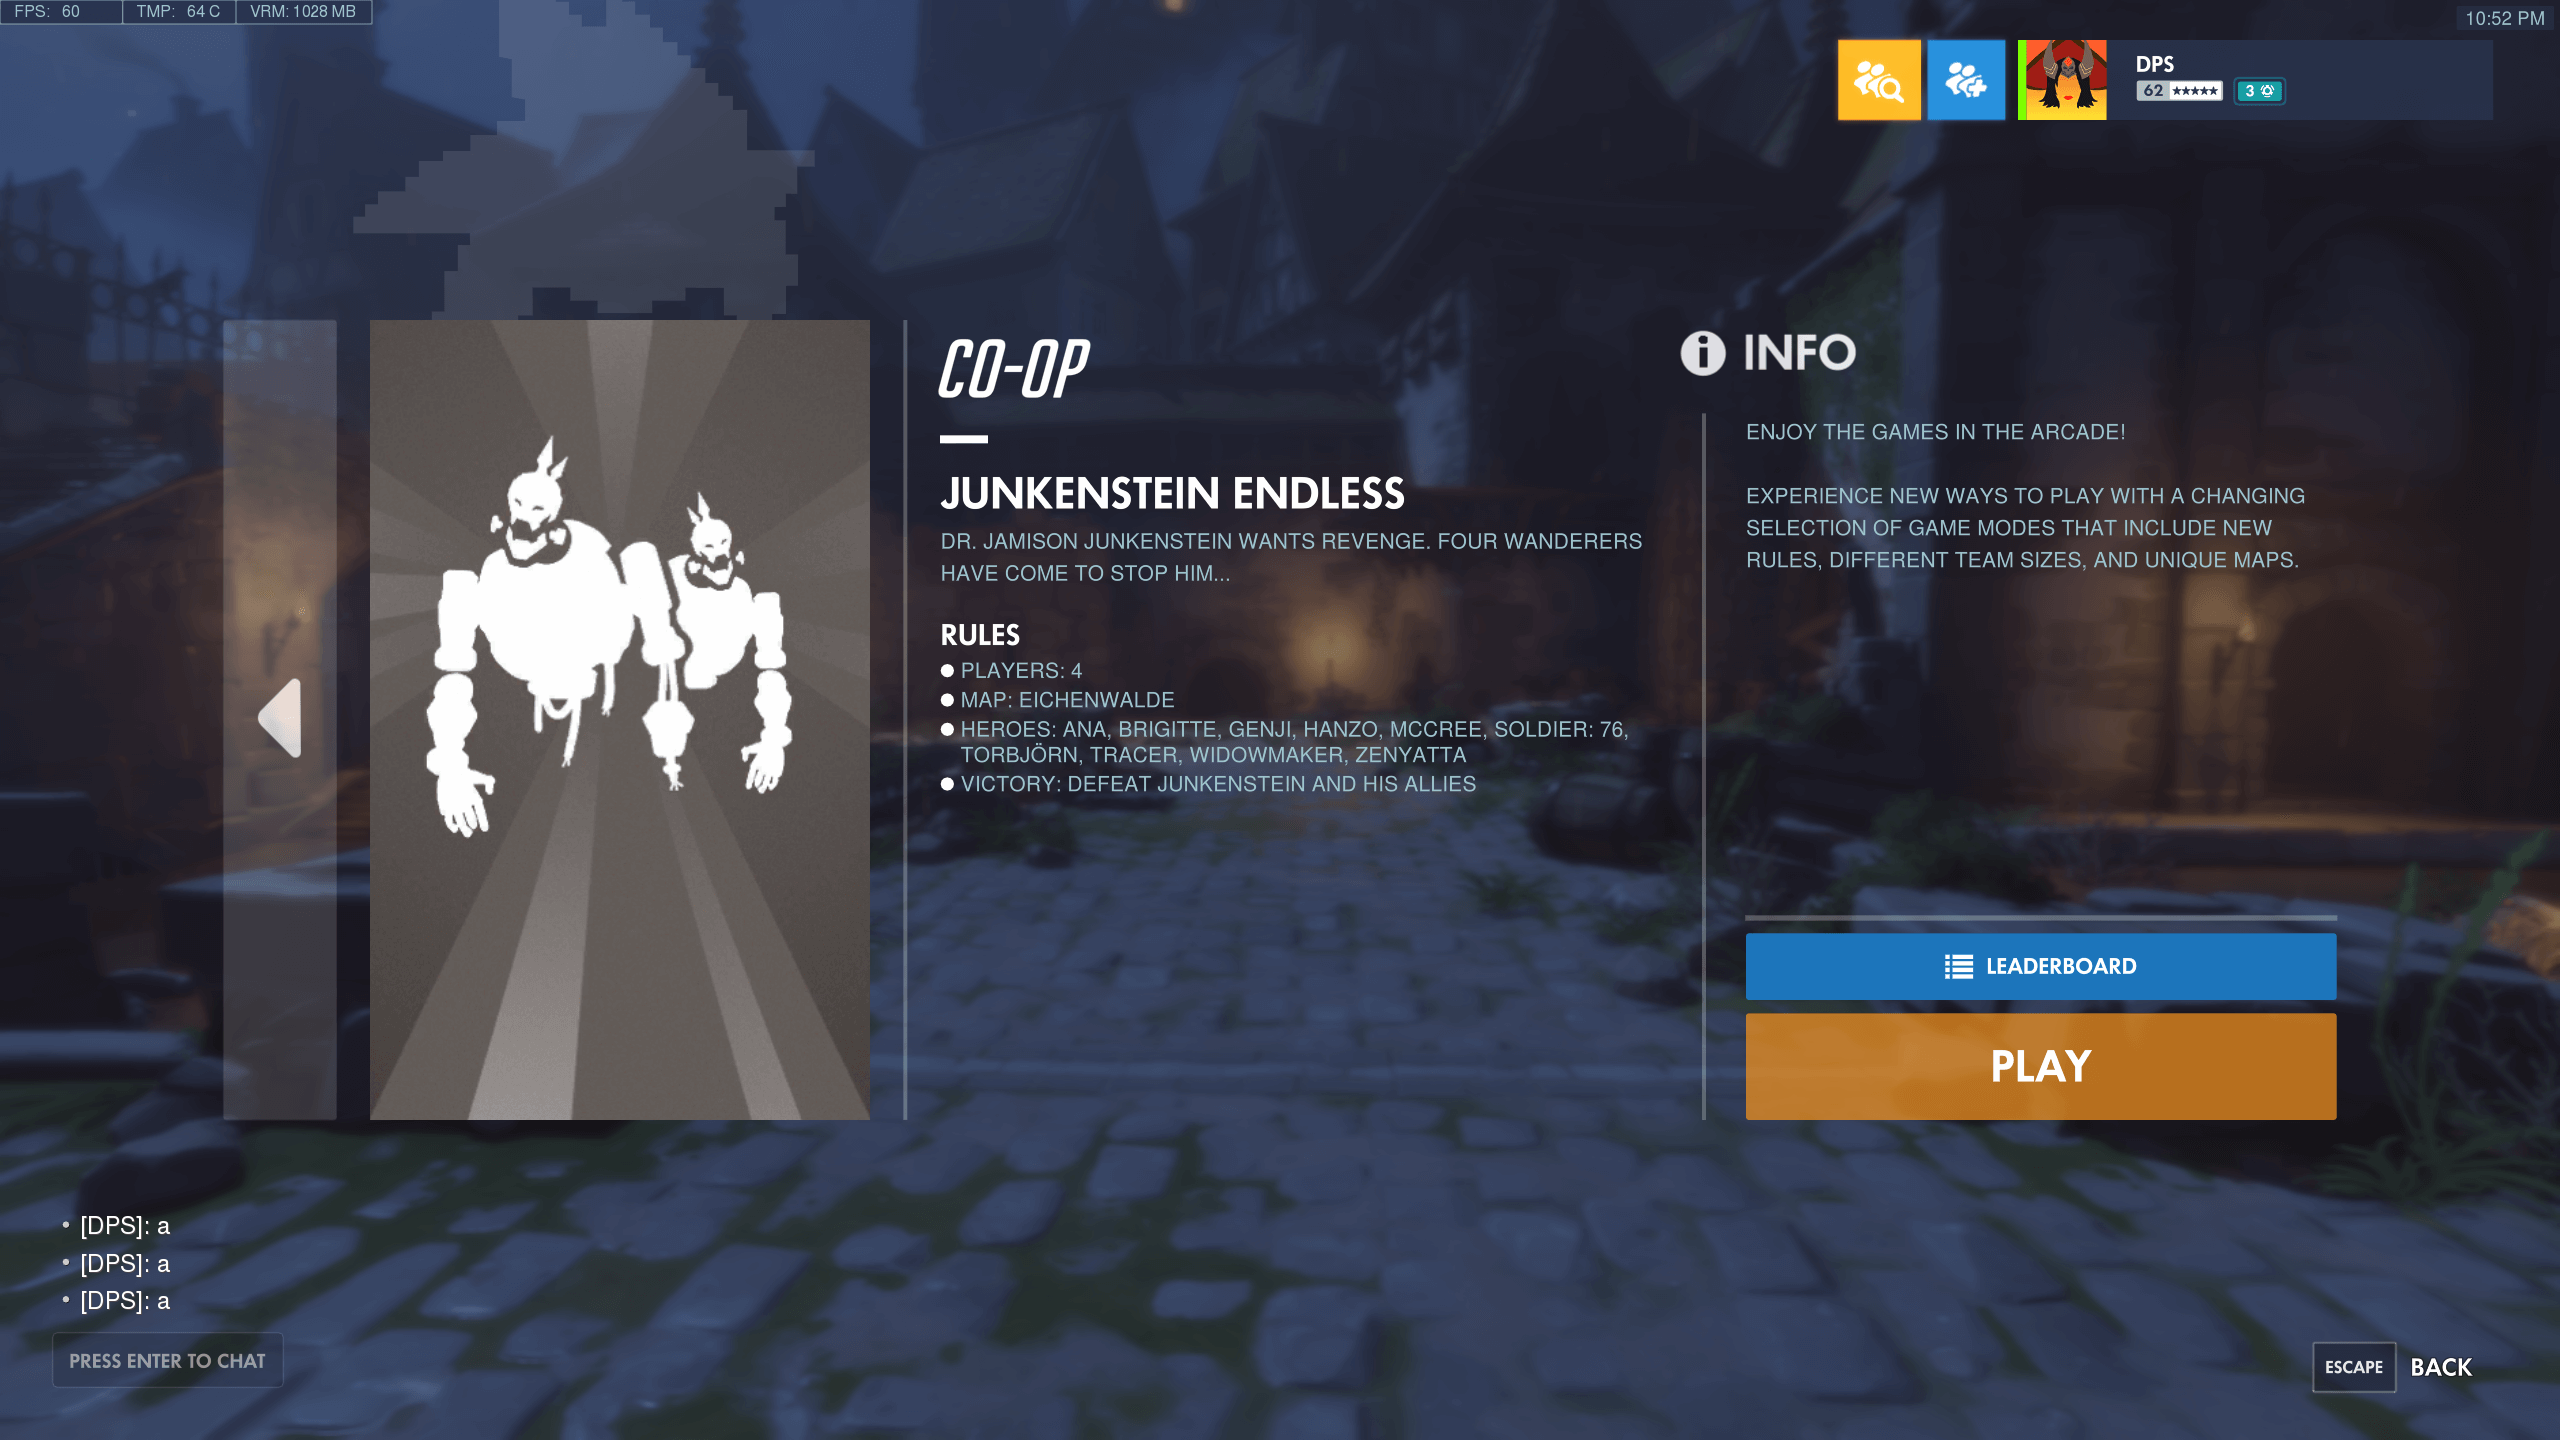
How to Score High in Overwatch Junkenstein Endless Arcade Mode
The Junkenstein Arcade mode in Overwatch is a seasonal event available only during the Halloween Terror weeks. It usually comes with two modes – Junkenstein’s Revenge and Junkenstein Endless, each with four difficulties – Normal, Hard, Expert and Legendary. The harder the game mode, the higher the score you get per second of survival. The […]
Some Hanzo Tips to Climb the Ranks in Overwatch
Hanzo is a long range sniper and a projectile shooter. If you can land his arrow shots effectively, he can be one of the highest damage output DPS heroes in the game. He is also one of the only two brothers who can climb the walls in the maps. The main factor to determines how […]