There are a lot of options and settings available in Overwatch. You can configure these settings however you want to suit your needs. However, there are a few settings that we think you should know which can help improve your performance in competitive plays. In fact, most pro players will have these settings applied for best game-play experience and some advantages.
Sound: Dolby Atmos For Headphones – Footsteps!
If you use a headphone, you definitely should enable the “Dolby Atmos For Heaphones” setting which can be found in Options > Sound. When this option is enabled, the audio in Overwatch will be rendered by Dolby Atmos surround sound technology. It allows you to better hear the sounds from the surroundings in the game. It is especially useful when it comes to hearing footstep of your enemies when they are close to you and knowing where they come from. You can read more about this technology here.
You can test it in the practice range in Overwatch. Turn on the “Dolby Atmos for Headphones” option, then try to position yourself in front of a shooting robot and slowly turn yourself 360 degree. You will notice the huge difference and how you can instantly identify the where the source of the sound comes from, even when it’s behind you. The best thing about this option is that it works with nearly any Stereo headphone. You don’t need an expensive headphone to have this setting works.

Turn it on and you will have the advantage of knowing where your enemy comes from especially when you are flanked by a flanker like Tracer or Genji.
Controls: Reticle / Crosshair
By default, some heroes in Overwatch have their own unique reticle/crosshair, such as Zarya, Hanzo, etc. If you do not like the default crosshair, you can change the crosshair to however you want by going to Options > Controls > Reticle.
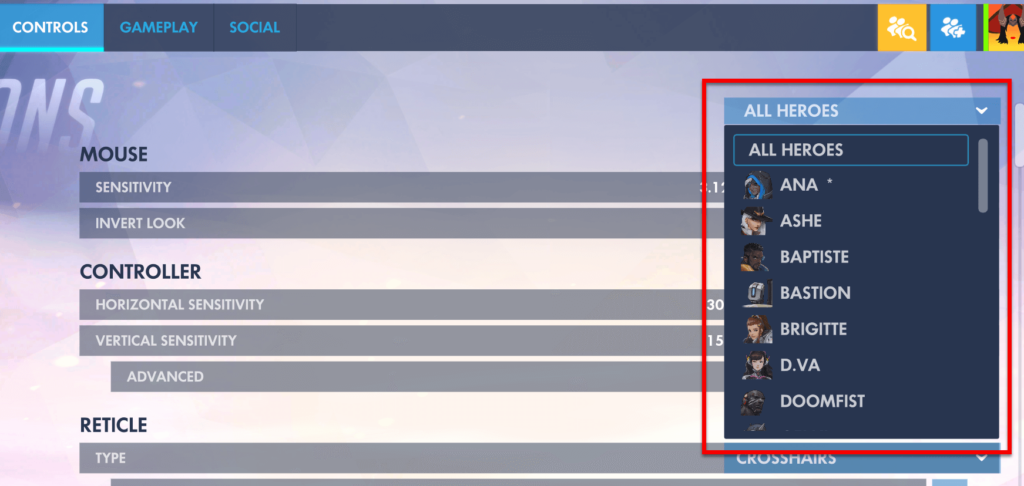
Note: When you are in the Controls settings page, at the upper right corner of the page, you can select to change the setting for ALL HEROES or selecting a hero’s name to change the setting for only that certain hero. For example: If you select Hanzo and change the reticle settings, the settings will only be applied to Hanzo’s reticle; you can only see your new crosshair when you use Hanzo. If you select “All Hereos”, the reticle will be applied to all heroes. If you want your custom reticle to be applied to all heroes but retain some of the heroes’ reticle to their default, you can first customize your own reticle for “All Heroes”. Once your custom reticle is applied to all heroes, you can then select any specific hero from the list, and select “Default” under reticle for that hero.
Under Reticle, you can configure the options to customize your reticle to however you want it to be. Here’s a screenshot of my reticle, which looks similar to that of the crosshair in Counter Strike:
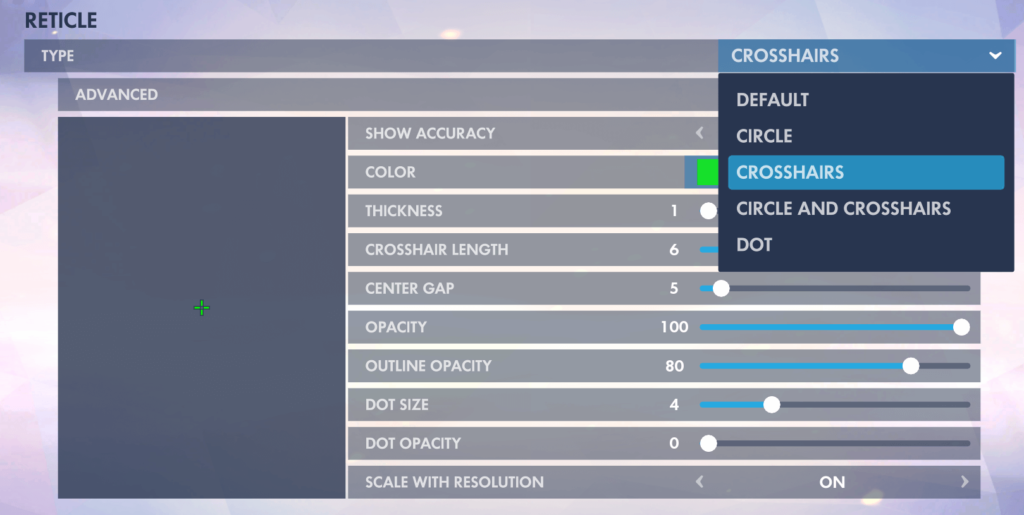
The “Type” determines how your reticle looks like in general, whether you want it to be like a circle, crosshair, circle + crosshair, or a simple dot. The “show accuracy” option determines if the reticle will expand as you shoot for certain hitscan heroes such as Soldier 76. The rest of the options are for the designs of the reticle. Just play around the options and you should be able to find what you want.
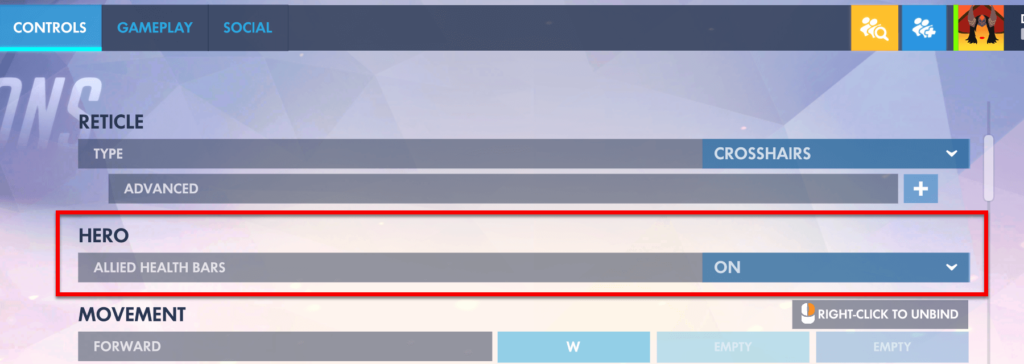
Controls: Hero – Allied Health Bars
This option is utterly important and should be always turned ON. As its name suggests, when it’s turned on, you can see your ally’s health bar in the game. This helps identify allies who are in danger and may need your help or protections by your abilities. It is especially important for support heroes to know who needs healing.
Controls: Hero – Relative aim sensitivity while zoomed
If you play heroes with zooming ability such as Widowmaker, Ana or Ashe, you should notice that the sensitivity when you zoom is different from that of your default sensitivity. You would usually feel much lower sensitivity while zoomed. This, fortunately, can be changed via a setting called “Relative aim sensitivity while zoomed” under Controls options.
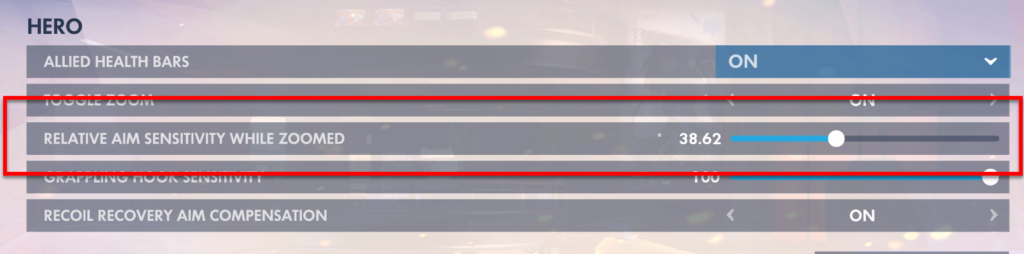
It involves complicated calculations if you want to find the right relative aim sensitivity. However, to have the closest possible aim sensitivity while zoomed to your default sensitivity, most players use 38.62 as the value of relative aim sensitivity while zoomed. You can check the reddit post here to see why.
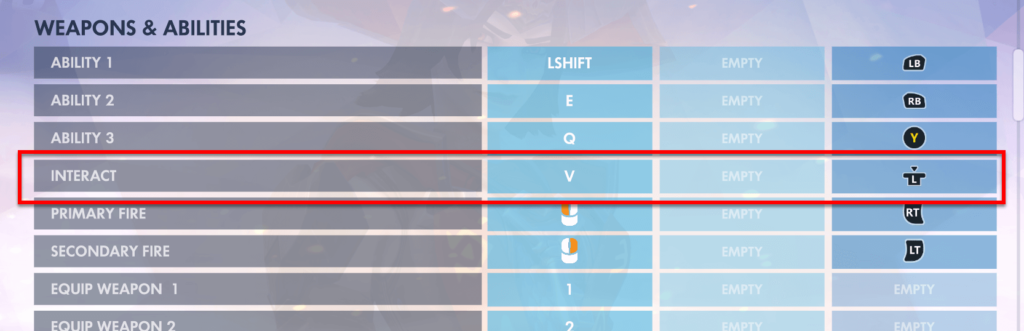
Controls: Weapons & Abilities – Interact
The Interact key is a new key introduced by Blizzard not long ago in Overwatch. For now, the only situation you can use your interact key is when you want use Symmetra’s teleporter to teleport from one location to another. The problem is, in some installations, the interact key isn’t set by default, which means there is no key to click to use Sym’s teleporter. If you have yet to set a key for the Interact option, do it now and set it to any key you feel comfortable with.
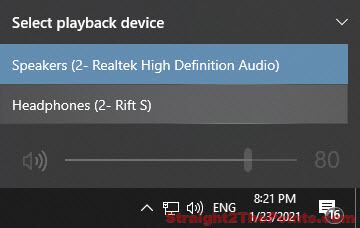
How to Switch Between Headphones and Speakers in Windows 10
If you have one or multiple pairs of headphones and speakers all connected to a same computer, instead of having to repeatedly plugging and unplugging your headphones or speakers, you can easily switch between them in Windows 10. How to switch between audio devices in Windows 10 To quickly switch between headphones, speakers or other […]
How to Make Desktop Icons Smaller in Windows 10
Windows 10 desktop icons appear to be too large for your preference? This short tutorial will show you several methods on how to reduce the size of desktop icons and make them look smaller in Windows 10. If one of the methods below doesn’t work, try the other.
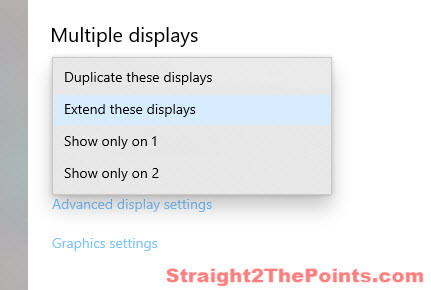
How to Close Laptop But Still Use External Monitor on Windows 10
There are times when we only want to run the laptop on an external monitor without laptop screen staying on (or with lid closed). However, without proper settings, your laptop will go into sleep mode, hibernate or even shut down when you try to close the lid or attempt to switch off its screen.
Overwatch Pro Tips: How to be a Better Reinhardt in Competitive Plays
Reinhardt has been and is still the most popular main tank in Overwatch competitive plays. Reinhardt is an easy tank to start with as a newbie, but it’s also difficult to actually master it and be useful with it. Rein has been always useful regardless of ranks and meta in history of Overwatch. It is […]
Simple Tips to Be a Better Soldier 76 in Competitive Plays
Soldier 76 is probably the most common and easiest to use hero for every beginner in Overwatch due to his similarity as a first person shooter character in other FPS games. Soldier 76 is also the starting hero everyone uses in the training mode in Overwatch. He is easy to use but not as easy […]