If you have one or multiple pairs of headphones and speakers all connected to a same computer, instead of having to repeatedly plugging and unplugging your headphones or speakers, you can easily switch between them in Windows 10.
Table of Contents
How to switch between audio devices in Windows 10
To quickly switch between headphones, speakers or other audio devices, follow the steps below.
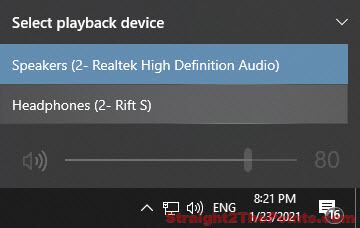
- On your desktop screen, left-click on the speaker icon on your notification bar at the bottom right side of the desktop screen.
- In the pop up that shows your current active audio device and volume bar, click on the name of the audio device.
- Then, select speakers, headphones of whichever device you want to use now. Windows should then switch to the audio device for playback.
How to set headphones or speakers as default device
If you don’t want the hassle of having to switch to a certain audio device every time you start your computer, you can set any of your headphones or speakers as default device so that Windows 10 will automatically select it as the main playback device during startup. There can only be one default device at a time for both input and output audio device. Here’s how to do it.
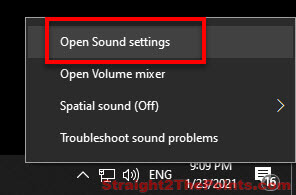
First, right-click on the speaker icon from the notification bar and then select “Open Sound settings“.
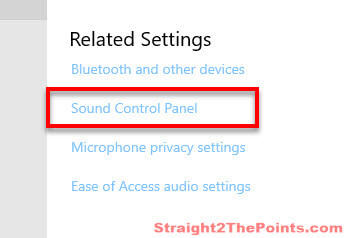
In the Sound settings window, under “Related Settings”, click on Sound Control Panel.
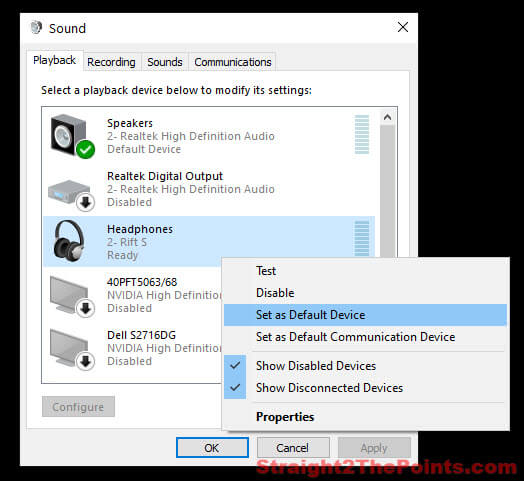
In the “Playback” tab, right-click on the audio device you wish to set as default device, then select “Set as Default Device“.
This only changes the default audio device. It tells Windows which audio device to use when you boot your PC. You can still switch between your speakers and headphones using the first method above whenever you want. Switching between your audio devices will not change the default device.
To disable an audio device without unplugging it, you can disable it in the sound control panel. Simply right-click the device you want to disable, then select “Disable“. To re-enable any previously disabled device, right-click on it and select “Enable“. You can also right-click and select “Test” to immediately test the device to see if it works to produce sound.
Audio device not appearing on the list of playback device
If you can’t see your devices on the list, make sure they are properly connected to your PC.
Then, make sure the “Show disabled devices” (and optionally “Show disconnected devices“) are enabled in the Sound control panel (as shown in the screenshot above).
No sound from headphones or speakers?
Headphones or speakers not producing any sound? It could be hardware issue or one of the followings.
- Check if the audio device is properly enabled (and not accidentally disabled) in the sound control panel.
- Double check if you have the correct device enabled if you have multiple devices (or sources of input such as TV or monitors that supports audio) on the list, you can try one by one while playing a music video until you hear sound from the problem headphones or speakers.
- Try to switch to the problem audio device and also try to set it as default device.
- Check the device’s volume.
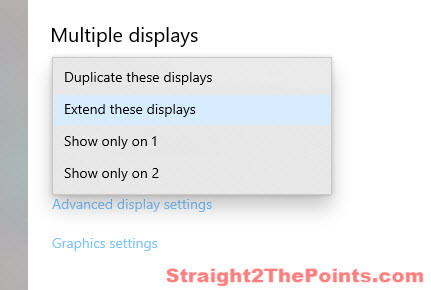
How to Close Laptop But Still Use External Monitor on Windows 10
There are times when we only want to run the laptop on an external monitor without laptop screen staying on (or with lid closed). However, without proper settings, your laptop will go into sleep mode, hibernate or even shut down when you try to close the lid or attempt to switch off its screen.
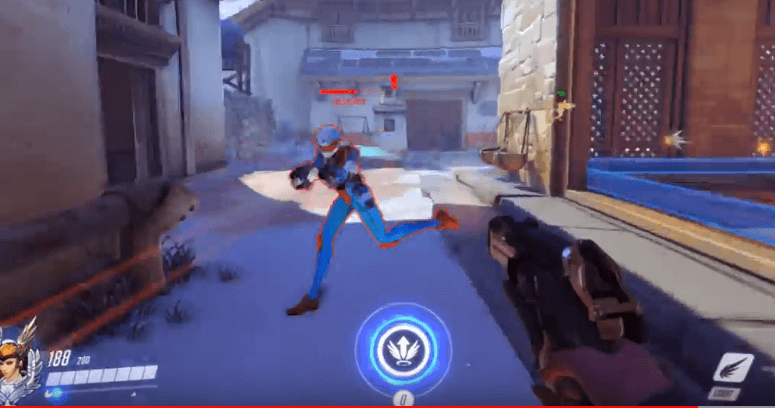
5 Important Overwatch Settings for Pro Competitive Plays
There are a lot of options and settings available in Overwatch. You can configure these settings however you want to suit your needs. However, there are a few settings that we think you should know which can help improve your performance in competitive plays. In fact, most pro players will have these settings applied for […]
How to Make Desktop Icons Smaller in Windows 10
Windows 10 desktop icons appear to be too large for your preference? This short tutorial will show you several methods on how to reduce the size of desktop icons and make them look smaller in Windows 10. If one of the methods below doesn’t work, try the other.
Fix: System_Thread_Exception_Not_Handled Nvlddmkm.sys
This post explains the error System Thread Exception Not Handled Nvlddmkm.sys BSOD in Windows 10, why it’s showing up and how you can fix it. Also applicable to similar error system thread exception not handled atikmdag.sys, ntfs.sys, acpi.sys, dxgmms2.sys, ntoskrnl.exe, wdf01000.sys, bcmwl63a.sys, or lvrs64.sys. Very often when end users like us meet these problems and post help on […]
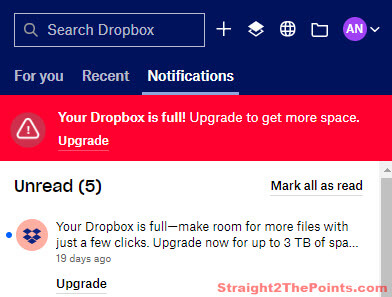
“Your Dropbox is Full” or “Almost Full” Message, What can you do?
Getting annoyed by the non-stop pop up of “Your Dropbox is full” or “Your Dropbox is almost full” notification message? Dropbox will continue to show the notification every times you boot your PC and at a certain time everyday to remind you how long it has been stop syncing your files due to maximum storage […]